AI Photo Prompts
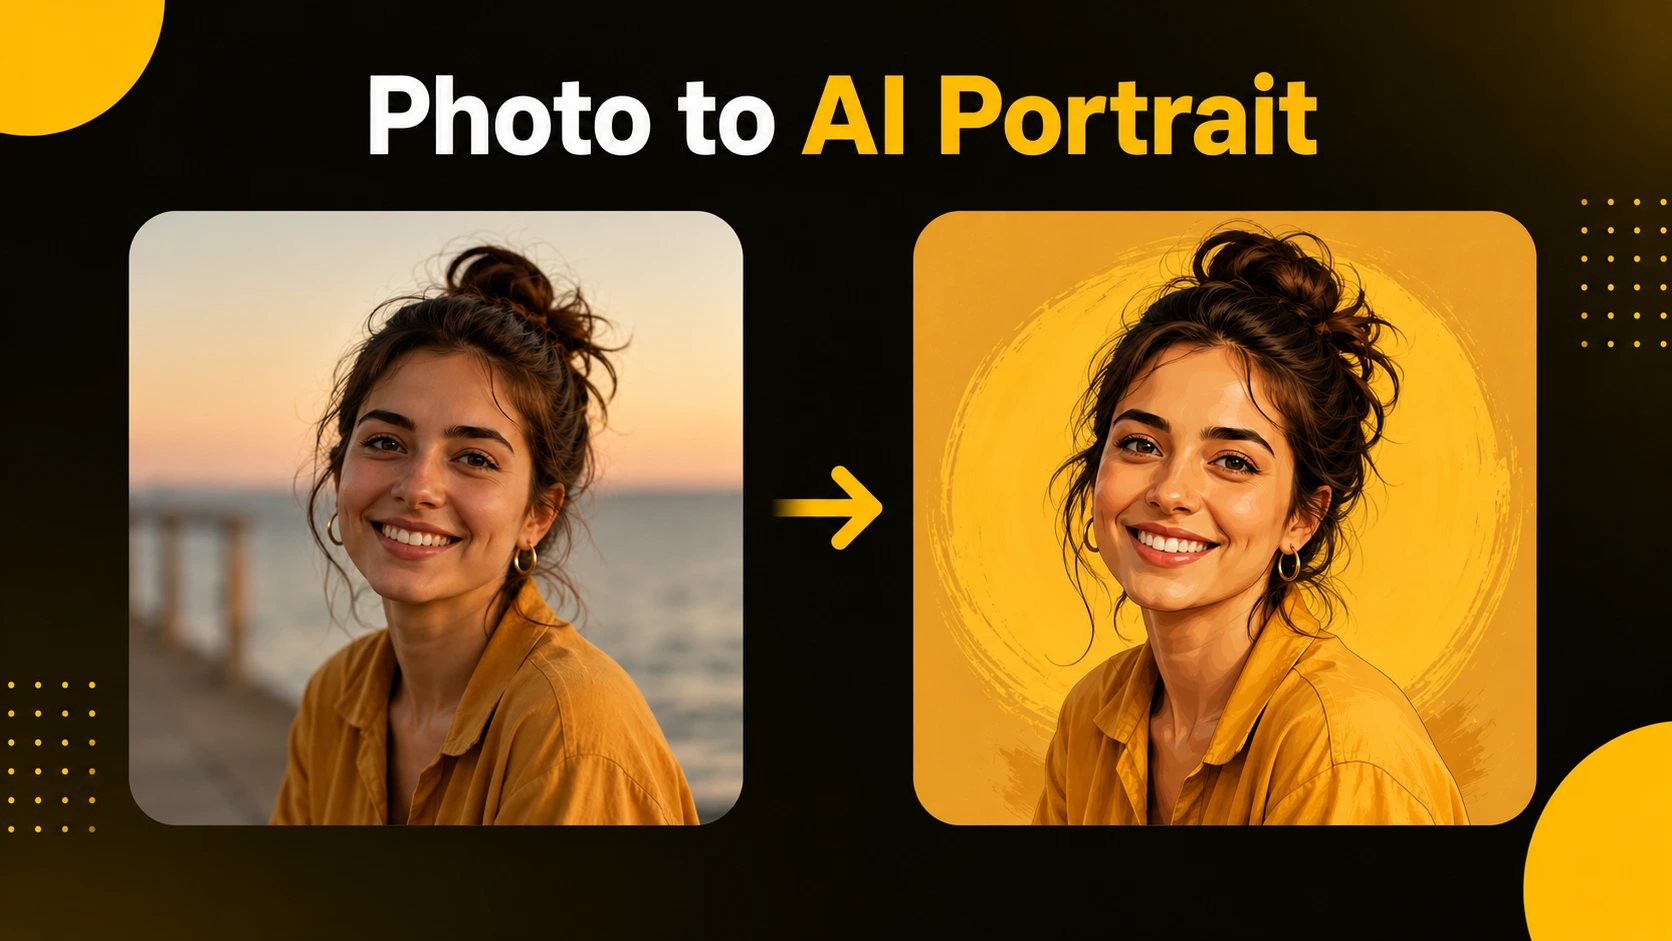
How to Turn Your Photo into an AI Portrait
Turn your photo into an AI portrait with Gemini or ChatGPT. The right photo, copy-paste portrait prompts, and how to keep your face looking like you.
Dhananjay Kumar Nirala
On this page 7
You can turn your photo into an AI portrait in a few minutes, with no editing skills and no expensive app. Upload a picture of yourself, give the tool a clear prompt, and it can hand back a studio headshot, a cinematic shot, or a soft black-and-white portrait.
The catch is that results vary a lot. The same tool can make you look amazing or turn you into a stranger, and the difference usually comes down to two things: the photo you start with and the prompt you give. Get those right and the rest is easy.
This guide walks through choosing the right photo, the one step most people get backwards, a set of portrait prompts you can copy, and how to keep the face looking like you. By the end you'll be able to make a portrait you'd actually want to post.
What you need to start
You don't need much for this. Three things, and two of them you already have.
An AI image tool. Gemini (often called Nano Banana) and ChatGPT both work well for portraits. Gemini tends to give the most lifelike faces, while ChatGPT is handy if you already use it. If you're unsure which to pick, our comparison of ChatGPT, Gemini, and Midjourney covers the differences.
A clear photo of yourself. This matters more than the tool. A sharp, well-lit picture of your face gives the AI something solid to work from.
A prompt. This is the instruction that sets the style, lighting, and mood. You can write your own or copy one of the prompts further down this page.
That's the full setup. No subscription is required to start, since both Gemini and ChatGPT have free options with daily limits.
Pick the right photo (this decides most of it)
The photo you start with sets the ceiling for your result. A great prompt can't fix a bad source image, so spend a few seconds here before anything else.
Use good, even light. A photo taken near a window or in soft daylight works best. Harsh shadows or a dark room give the AI less of your face to read.
Keep your face sharp and clear. Blurry or low-resolution photos lead to faces that drift away from yours. A clean, in-focus shot keeps the likeness close.
Face the camera, fairly straight on. A front or slight-angle view is easier for the tool than an extreme side profile. Your eyes should be visible and open.
Keep the background simple. A plain or uncluttered background helps the tool focus on you, not on guessing what's behind you.
Use one clear subject. For a solo portrait, pick a photo with just you in it. Group photos can confuse the tool about whose face to keep.
The one rule: upload first, then prompt
This is the step most people get backwards, and it quietly ruins results. Add your photo to the chat first, then paste the prompt. If you send the prompt before the image, some tools ignore your photo and generate a random face instead of editing yours.
Why the order matters. When the photo is already there, the tool treats it as the reference and edits from it. Send the words first and it may start creating before your image is in front of it.
The simple habit: attach the photo, wait until it shows in the chat, then paste your prompt and send. One small change, and your likeness comes through far more often.
For the full step-by-step of running a prompt, from opening the app to downloading the result, see the nano banana prompts guide.
Portrait styles to try (with copy-paste prompts)
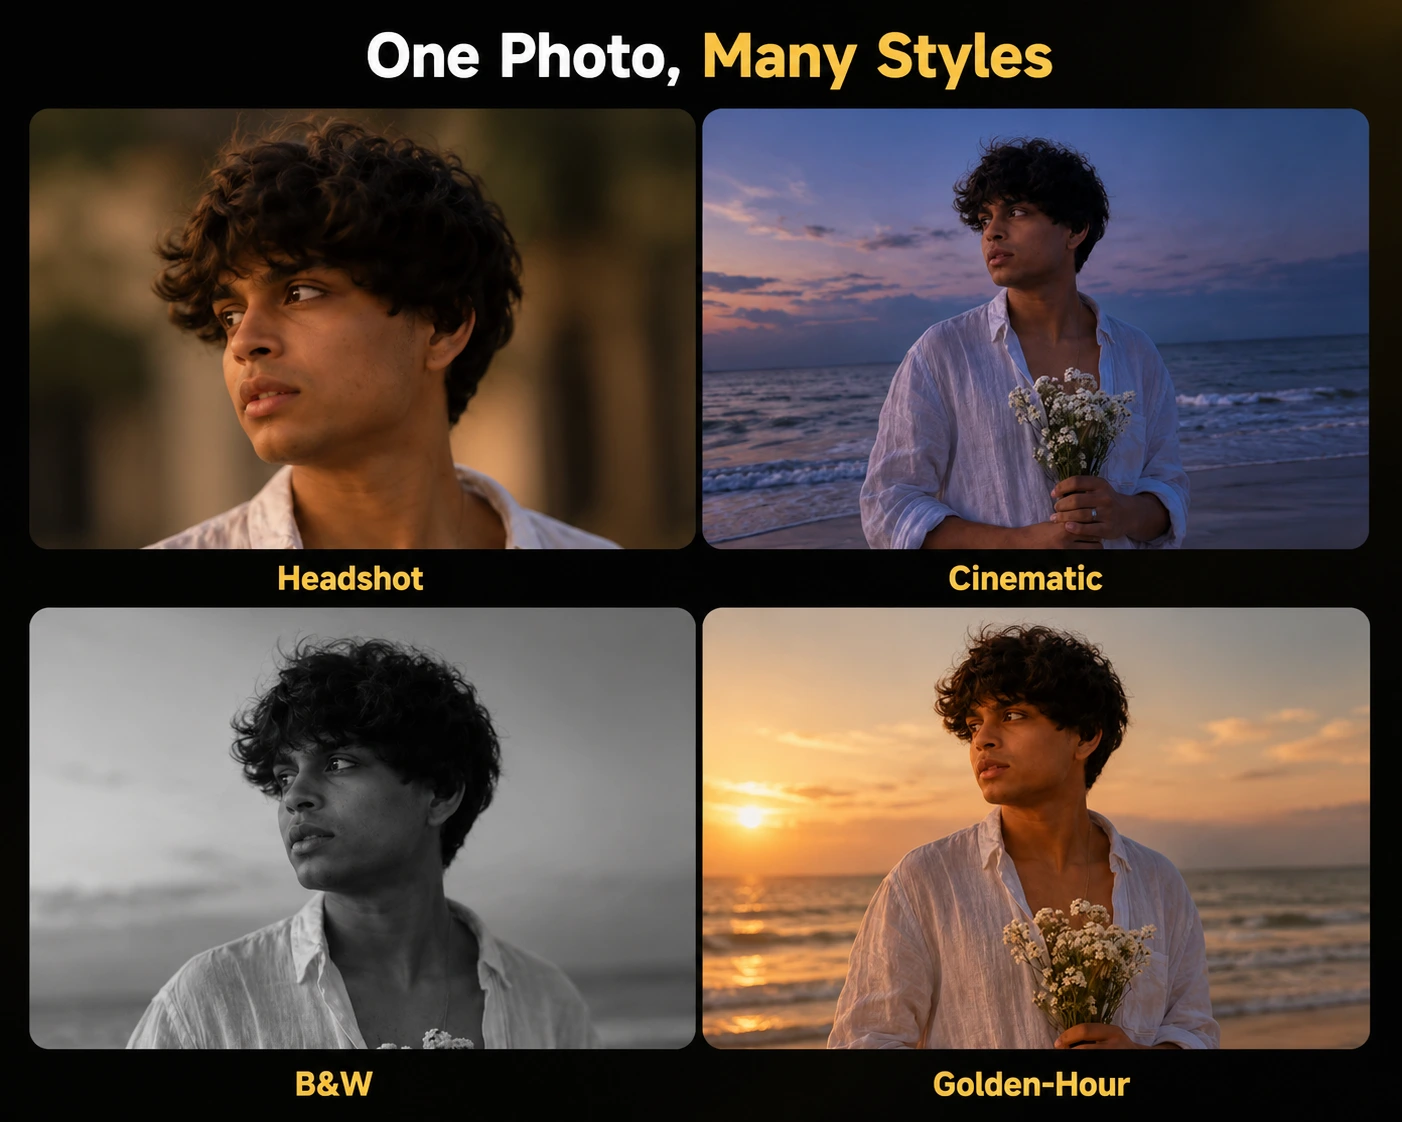
Here are four portrait looks with ready prompts. Upload your photo first, then paste one. Each keeps your face recognizable, so start there and tweak the details.
1. Professional headshot. Clean and business-ready, good for LinkedIn or a work profile.

Create a professional corporate headshot from my photo. Keep my face natural and recognizable. Soft studio lighting, plain neutral background, 85mm lens look with a shallow depth of field, slight smile, direct eye contact. Sharp, magazine-quality.
2. Cinematic portrait. Warm, film-like, good for a striking profile picture.
Turn my photo into a cinematic portrait. Keep my face recognizable. Warm low light, a softly blurred background, a gentle film-style color grade, and a calm, confident mood. Close-up, high detail.
3. Black-and-white studio. Timeless and dramatic, all about light and shadow.
Create a black-and-white studio portrait from my photo. Keep my face natural. High-contrast lighting, deep shadows, a plain dark background, and a serious expression. Classic, editorial style.
4. Outdoor golden-hour. Soft, natural, and easy to like.
Turn my photo into an outdoor golden-hour portrait. Keep my face recognizable. Warm sunset light, a blurred park background, a relaxed pose, and a natural glow. Lifelike and detailed.
To make any of these yours, change one detail at a time, like the background, outfit color, or expression. For more ready looks, browse the free image prompt library.
Keep your face looking like you
The most common complaint about AI portraits is that the result looks great but barely resembles you. The tool tends to smooth and "improve" faces by default, which slowly turns you into someone else. A few habits keep your likeness intact.
Always include the recognizable line. Add "keep my face natural and recognizable" to every prompt. It's a small line that does a lot of the work.
Start from a clear photo. This comes back again because it matters most. The sharper your source, the closer the face stays to yours.
Avoid heavy style requests for likeness. Strong looks like cartoon or fantasy art pull the face further from real. If matching your face is the goal, stick to realistic styles.
Compare side by side. Put the result next to your original photo. If the eyes, nose, or face shape drifted, say so directly: "keep my original eyes and face shape," then run it again.
Fix it in small steps. If the likeness is off, change only that and regenerate. Adjusting one thing at a time keeps you from trading one problem for another.
Fix common portrait problems
Even with a good photo and prompt, a few issues come up often. Here's how to clear each one quickly.
The skin looks too smooth or fake. Add "natural skin texture, realistic skin detail" to the prompt. The default look is often over-polished, and this pulls it back toward real.
The lighting is harsh or flat. Name the light you want. "Soft, even lighting" removes hard shadows, while "warm directional light" adds shape and depth.
The eyes look off. Eyes are where a face wins or loses its likeness. Add "sharp, natural eyes, looking at the camera," and start from a photo where your eyes are clearly visible.
The result is cropped wrong for posting. Set the frame in the prompt. Ask for a 4:5 portrait for Instagram, 9:16 for a story, or 1:1 for a profile picture.
It changed something you didn't ask it to. Be specific about what to keep. "Keep my hairstyle and outfit the same," then regenerate so it only edits what you wanted.
Conclusion
Turning your photo into an AI portrait comes down to two things: a clear source photo and a prompt that names the style. Upload the photo first, keep the recognizable line in every prompt, and change one detail at a time when something looks off.
Try one style today. Pick a prompt from above, upload a sharp photo of yourself, and see what comes back. If the face drifts or the light feels wrong, you now know the small fixes that bring it back. After a couple of tries, a portrait you're happy to post is easy to get.
When you want more looks to start from, browse the free prompt library and copy one that fits the style you're after.
FAQ
Frequently asked
Is it free to turn a photo into an AI portrait?
Why doesn't my AI portrait look like me?
Which is best for AI portraits, Gemini or ChatGPT?
Can I do this on my phone?
Is it safe to upload my photo?
What photo works best for an AI portrait?
More to read